Banana Coconut Mini Muffins

Banana Coconut Mini Muffins

I eat a ton of bananas throughout the week so I’m constantly buying bunches at the store.  Like a lot of people, I am pretty picky about the ripeness of my bananas.  I don’t like them too green or too soft.  I tend to have a lot of bananas left over at the end of the week.  I hate to waste  food so I am always trying to find ways to incorporate these bananas into my baking.

This week I also had half a bag of fresh coconut left over from another recipe.  I decided to combine the two and make mini muffins.  The mini muffin is perfect because it is bite sized.  You can kill your sugar craving with just one of these bad boys or you can eat eight of them and tell yourself it’s really only like eating one large muffin so it’s okay.  Either way, you are really going to enjoy these.  Let’s get started.

Ingredients:

1 1/4 cups all-purpose flour
1 teaspoon baking powder
1/4 teaspoon salt
2 very ripe bananas, mashed (3/4 cup)
1 stick (1/2 cup) unsalted butter, melted
2/3 cup sugar
1 large egg
1/2 teaspoon vanilla
3/4 cup sweetened flaked coconut

Put oven rack in middle position and preheat oven to 375°F. Line muffin cups with liners.  I used two mini muffin tins and this recipe yielded about 4 dozen muffins.

Whisk together flour, baking powder, and salt in a bowl. Whisk together bananas, butter, sugar, egg, vanilla, and 1/2 cup coconut in a large bowl until combined well, then fold in flour mixture until flour is just moistened.

Divide batter among lined muffin cups and sprinkle with remaining 1/4 cup coconut. Bake until muffins are puffed and golden, about 25 minutes. Transfer muffins to a rack and cool slightly.

Recipe credit:   Gourmet 2004

Edible Holiday Gifts

PasadenaDaisy

Creative and unique gifts are always appreciated.  I love doing something special for loved ones.  As a dog lover, I also love including the dogs!  I thought what better way to show my love this holiday season, than cookies?

PasadenaDaisy

I made double batches of my three (current) favorite cookies:  Peanut Butter Cookies with Chocolate ChunksChewy Molasses Cookies and Homemade Dog Biscuits.  These recipes are all super easy and quick so I had a large cookie stash in one afternoon.

I have to mail my gifts, so to protect the cookies during shipment, I decided to go with typical cookie tins.  While cute, they can tend to be a bit generic.  I wanted to add a more personal touch so I included handmade recipe cards in my gift packs.

The process was fairly simple.  First, I began with two giant paper pads that you would typically use for scrapbook.  These pads are great.  They include 48 sheets and multiple patterns.  I decided to use holiday paper for the cookies and everyday paper for the dog biscuit recipes.

Second, I printed each recipe onto brown craft paper.  You can find this at any craft store or office supply store.  I like the rustic feel it gives the recipe cards.

I cut the scrapbook paper and the recipes to the desired size with a paper-cutter to keep things as straight as possible.  They aren’t perfect but I’m okay with that.  They are handmade and are supposed to be rustic!

To adhere the recipe to the scrapbook paper, I sprayed the back of the recipe with an adhesive.  The result are these super cute personalized recipe cards that my friends and family can keep long after the cookies are gone.

PasadenaDaisy

Rubber stamps were used to personalize the recipe cards as well as the envelopes for the holiday cards I enclosed with the gifts.

PasadenaDaisy

Finally, I wrapped the tins, recipe cards and holiday cards together with twine.

IMG_1440

When thinking of personalized gifts for the people on your list, remember that you don’t always have to spend a ton of money to make your gift memorable and special.  If you take just a little time and add your own personalized touch to the gifts you give, I promise the gesture will touch the recipients and they will remember your gift long after the holiday.

Peanut Butter Cookies with Chocolate Chunks

Peanut Butter Cookies with Chocolate Chunks

Everyone has a favorite cookie and this would be mine.  I make these all the time and every time they are a huge hit.  The best part about this recipe is that it is easy.

Ingredients:

Peanut Butter Cookies with Chocolate Chunks

1 1/2 cups unbleached all purpose flour
1/3 cup old-fashioned oats
1 teaspoon baking soda
1/4 teaspoon salt
1 cup old-fashioned chunky peanut butter (about 9 ounces) – I used creamy and chopped up and added some peanuts to the batter.
1 cup (packed) golden brown sugar
1/2 cup (1 stick) unsalted butter, room temperature
1/4 cup honey
1 large egg
1 teaspoon vanilla extract
5 ounces semisweet chocolate, coarsely chopped

Preparation:

Peanut Butter Cookies with Chocolate Chunks

Mix flour, oats, baking soda and salt in medium bowl.

Peanut Butter Cookies with Chocolate Chunks

Using a mixer, beat peanut butter, brown sugar, butter, honey, egg and vanilla in large bowl until well blended.

Peanut Butter Cookies with Chocolate Chunks

Stir dry ingredients into peanut butter mixture in 2 additions.

Peanut Butter Cookies with Chocolate Chunks

Stir in chopped chocolate. Cover and refrigerate until dough is firm and no longer sticky, about 30 minutes.

Preheat oven to 350°F. Butter 2 heavy large baking sheets or do as I do and use parchment paper.  This makes clean up so easy!

Peanut Butter Cookies with Chocolate Chunks

With hands, roll 1 heaping tablespoonful of dough for each cookie into 1 3/4-inch-diameter ball. Arrange cookies on prepared baking sheets, spacing 2 1/2 inches apart. Bake cookies until puffed, beginning to brown on top and still very soft to touch, about 12 minutes.

Peanut Butter Cookies with Chocolate Chunks

Cool cookies on baking sheets 5 minutes. Using metal spatula, transfer cookies to rack and cool completely.

These turned out amazing and are super addicting!  I made a double batch so I could send these to friends and loved ones for the holidays.

Please give this cookie recipe a try.  You can find the entire recipe on Epicurious.com.  As usual I want to see pictures of your handy work!

Happy holidays!

Creamy Tomato Soup and Grilled Goat Cheese & Chicken Panini

When I think of comfort food, tomato soup and grilled cheese are at the top of the list.  It’s a classic combination that I added a little gourmet touch to.

The Tomato Soup recipe I use is from Epicurious.com.  It includes instructions for making your own brown butter croutons to garnish your soup.  I made this on a Monday night and didn’t feel like making the croutons so I skipped that part and added some store bought croutons.  I find Trader Joe’s brand are really good.  I also did not have celery seed so I substituted fennel seeds instead and it turned out great.

Tomato Soup Ingredients:

Tomato Soup Ingredients

1 tablespoon unsalted butter
1 tablespoon olive oil
1 medium onion, thinly sliced
3 garlic cloves, smashed with the side of a knife and peeled
5 cups canned whole tomatoes in juice
1 cup water
2/3 cup heavy cream
2 teaspoons kosher salt, plus more as needed
1/4 teaspoon freshly ground black pepper, plus more as needed
1/4 teaspoon crushed red pepper flakes
1/4 teaspoon celery seed
1/4 teaspoon dried oregano or 1/2 teaspoon finely chopped fresh oregano
1 tablespoon sugar

Directions:

IMG_0751
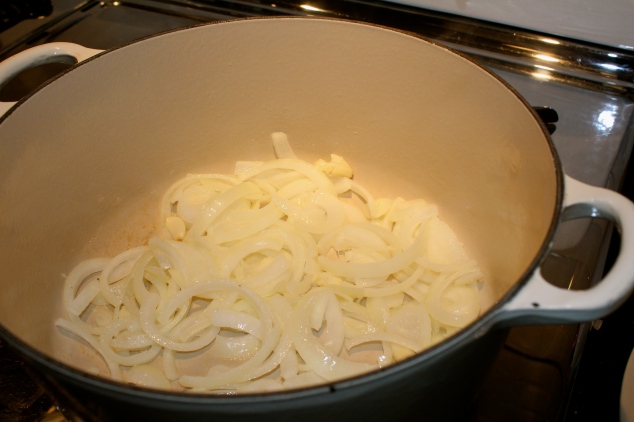
Heat the butter and olive oil in a large saucepan and sauté the onion and garlic until the onion is translucent, about 5 minutes.

Add the tomatoes, water, cream, salt, red pepper flakes, celery seed (I used fennel), oregano, and sugar. Bring to a boil, lower the heat to a simmer and simmer for 15 minutes.

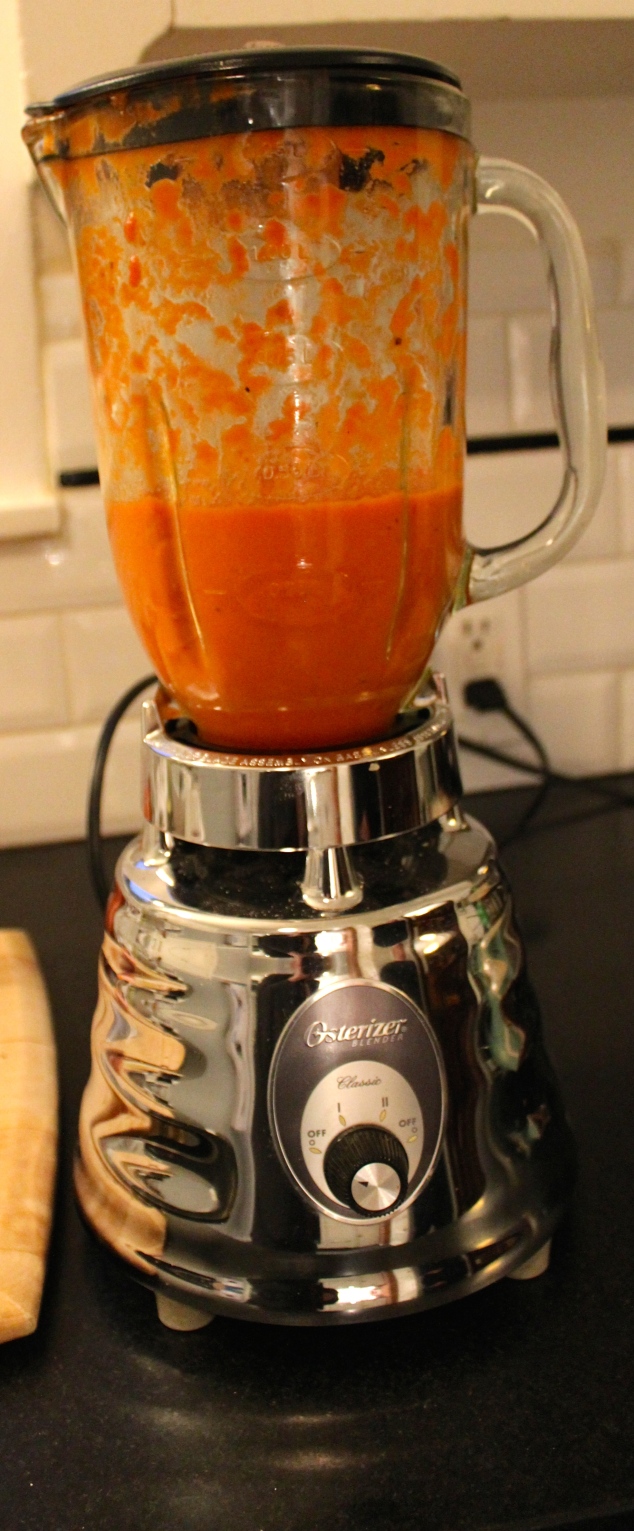
Remove from the heat and puree in batches in the container of a blender.  Be very careful not to over fill your blender.  The heat will cause it to spray all over which could cause you to get burned.  I like to hold the lid down with a kitchen towel while the blender is on.

Tomato Soup

Return the soup to the pot and reheat to a simmer, seasoning to taste with more salt and pepper.

I transferred my soup to a tureen which makes a very lovely presentation and made our rustic Monday night dinner feel a bit fancier.

I placed some croutons in a soup bowl and ladled the soup over the top.  Yum!  Try not to be as messy as I was.

Now it’s time to make the Grilled Goat Cheese & Chicken Panini.  These are delicious and a great compliment to the tomato soup.

Grilled cheese sandwiches are very versatile and don’t have to be like the ones you had in your hot lunch at school.  You can make them as plain or as fancy as you want.  I took this one up a level by adding some simple gourmet ingredients.

For this sandwich, I used basil, thyme, rosemary, garlic, extra virgin olive oil, heirloom tomatoes, grilled chicken and goat cheese.  I live in Pasadena where these particular ingredients are readily available year round.  If you can’t find these fresh ingredients, that’s okay.  Use whatever is in season at your market.

Combine all fresh herbs and garlic (I used 8 cloves) into a blender or a food processor along with about 1/2 cup of olive oil.  Blend until you have a herb flavored oil.   Cut bread in half and spread herb oil on the inside of each piece.  You can use whatever bread you prefer.  I used a panini roll.

Grill bread face down (herb spread down) on the grill until it begins to toast.  Remove bread from grill.  Assemble all ingredients on grilled bread.  I began by spreading the goat cheese on the bottom, followed by the heirloom tomato and chicken I had previously grilled. Top with second piece of bread.

Grilled Goat Cheese and Chicken Panini

Grill until cheese is melted, flipping sandwich once.  I placed my cast iron skillet on top of the sandwiches to “press” them while they grilled.

I had some of the herb oil left over so I drizzled over the sandwiches and the soup as a garnish.  Slice your panini in half and serve with the tomato soup.

This sandwich was delicious.  The herb oil combined with the goat cheese was such a great combination.  I also like to dip my sandwich in the soup.

Please enjoy this easy, rustic comfort food staple made a little bit gourmet with just a couple of extra touches!

Oatmeal Cookies

Cook on a rack.

Cool on a rack.

Oatmeal cookies have been a favorite forever but I haven’t made them for a while.  I had all the ingredients on hand so I thought I’d pull out my recipe again.

As usual, I found this recipe on Epicurious.com.  This is not your typical Oatmeal Cookie.  They are cake like, low fat and almost like trail mix in cookie form.

First, assemble the ingredients.  This recipe is fairly simple.  I did not follow the recipe to the letter.  I added cranberries instead of raisins.  I also added some almonds because I had them on hand.

Oatmeal Cookies

Combine Wet Ingredients

Combine the milk, oil, sugar, oatmeal, eggs, and vanilla. Beat well.   I like to use my stand mixer.

Oatmeal Cookies

The batter on this was not too thick.

Oatmeal Cookies

Next you will gradually add flour mixture to large bowl and combine thoroughly. Then gently stir in cranberries (or raisins) and nuts.  I added almonds.

Oatmeal Cookies

Drop a rounded tablespoon of the batter onto a cookie sheet lined with parchment paper.  Bake at 350 degrees for 15-18 minutes.  Reminder – cookies will be very cake like and moist.

I decided to give these cookies to a friend as a gift and had some fun packaging them up!

Hopefully you try this recipe and make it your own.  Let me know what type of dried fruit you add to yours and how they turned out.

Bon Appetite!

Coconut Blondies – Happy National Brownie Day!

Coconut Blondies

Today is National Brownie Day so of course I had to share my favorite brownie recipe.  Okay so this is a blondie recipe but I’m pretty sure it counts.

My husband has been asking me to make blondies for a while now.  I wanted to find a twist to the traditional recipe so I decide to go with this Brownie Recipe that I found on Epicurious.com.  It took two of his favorites – blondies and coconut and combined them – perfection!

Coconut Blondies

Ingredients:

2 sticks (1/2 pound) unsalted butter
2 cups packed light brown sugar
1 teaspoon pure vanilla extract
2 large eggs
1 1/2 cups all-purpose flour
3/4 teaspoon baking soda
1/2 teaspoon salt
1 1/2 cups pecans (6 ounces), toasted and cooled
2 cups sweetened flaked coconut, divided

Preparation:

Preheat oven to . Butter and flour a 13- by 9-inch baking pan.

Toast nuts – recipe calls for pecans but I used the walnuts I had on hand.

Coconut Blondies

Melt butter in a 3-qt heavy saucepan over low heat, stirring, until smooth. Remove from heat and cool to lukewarm. Whisk in brown sugar and vanilla. Whisk in eggs 1 at a time until mixture is glossy and smooth.

Whisk together flour, baking soda, and salt, then whisk into butter mixture. Stir in pecans and 1 1/2 cups coconut.

Spread in pan and sprinkle with remaining 1/2 cup coconut.

Bake at 350°F with rack in middle, until a pick inserted in center comes out clean, about 35 minutes. Cool completely.

IMG_0615


These brownies turned out amazing!  They are sweet but not too sweet.  The nuts along with the coconut add a nice crunchy texture that is wonderful.

I hope you make this recipe your own.  Please try it then send me the pictures and I will share them.  I hope that your family enjoys them as much as we did.

Happy National Brownie Day!


The Yellow Dog Project

The Yellow Dog Project https://www.facebook.com/TheYellowDogProject

So many people love dogs.  When you walk down the street and see a fluffy nutter butter, your first instinct is to want to pet them and let your dog or child meet them right?  Have you ever considered this might not be safe for you, your children or dog?

There are all kinds of reasons a dog may need extra space.  It does not always mean a dog is aggressive.  Dogs can have a medical issue, may be recovering from surgery, may need to restrict their movement or excitement level.  The dog may have fear or anxiety issues or may not be child friendly.  They could be a rescue or shelter dog who is still acclimating to their new surroundings, etc.

Daisy is a deaf dog rescue.  While she is very loving, she is very fearful which causes her to be extremely leash reactive.  She is by far the most reactive to other dogs but on occasion she gets uncomfortable when people are walking toward or too close to us.   She is terrified of children and strollers.  As you can imagine, we do a lot of bobbing and weaving when we are on our walks.  We do our best to avoid unsolicited encounters, but it causes me a ton of anxiety.

NKLAThe No Kill movement (check out NKLA) is huge, and growing more and more every day.  I am a huge supporter of it and want to see it continue to grow.  As it does though, I feel that we also have a responsibility to educate the public about shelter dogs and how they may need special accommodations, treatments and / or special attention.  Dogs coming out of shelters need time to adjust and certainly may need their space on their walks.

As a deaf doggie rescue mom who’s pup needs space, I was so happy to hear about The Yellow Dog Project.  The Yellow Dog Project is a non-profit organization that has created a global movement to increase awareness on the proper way to approach a dog and to assist dog owners by clearly identifying your dog needs space by tying a yellow ribbon to their leash.

PasadenaDaisy - The Yellow Dog ProjectI have tied a yellow ribbon to Daisy’s leash and I need your help to spread the word and raise awareness about what it means.  It’s such a simple solution to a huge source of anxiety for me.  It may not be able to prevent all inappropriate encounters, but we are one step closer to reducing the frequency of those greetings.

Please check out https://www.facebook.com/TheYellowDogProject.  Like and follow their page.  I would also encourage you to share the page with your friends and family.  Please feel free to share this blog post as well as my Tweets, etc. regarding this topic.

If we can continue to get the word out, dog owners who need space will be able to go on walks with their best friends with less fear of the well-meaning, but uninformed encounter.

Thank you for your support!